Technique: Dry Brining

Recipe by Mandy Pagano

dry-brined-steaks.jpeg->first()->description

If you’ve ever roasted a turkey, you’ll probably be familiar with brining. If you’re not, the nutshell is this: brining is a technique wherein you soak meat in a salt water solution for some period of time, anywhere from a few hours to several days if it’s a particularly large cut or a full-sized bird. The idea is that you are simultaneously tenderizing your meat while the seasonings basically soak in, seasoning much deeper inside your cut than a simple dusting of salt and pepper. Brining provides a depth of flavor and tenderness that only seasoning right before cooking doesn’t match.

Dry brining is exactly what it sounds like; you use salt (and whatever other seasonings you like) to tenderize and boost the flavor of your meat, minus the water part. No leaky bags or sloshy Tupperware containers needed! And as long as you don’t go overboard with the salt, there’s no need for rinsing afterward, either.

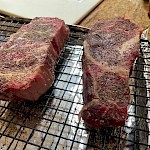
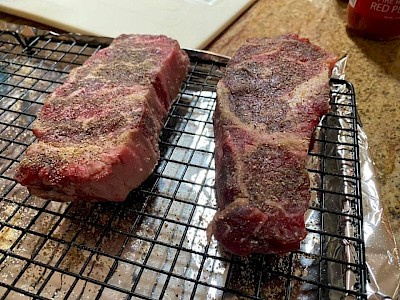
Dry brining can be used to tenderize and season pretty much any cut of non-ground meat (dry brined baby backs were amazing, y’all). All you need is a baking tray that will fit in your fridge, a rack upon which your meat can stand, some coarse salt, your meat of choice, and whatever other seasonings you want to use. I rarely measure my seasonings when I dry brine my steaks, for example, but half pound piece of meat should get somewhere between 3/4 tsp and 1/2 tbsp of salt (read more about how it works and get some more concrete seasoning conversions and ideas here).

You can dry brine smaller cuts of meat for a minimum of an hour, or up to two days total. Larger cuts will probably need to stand overnight at a minimum. When you’re ready to cook, let your meat stand on the counter so it comes to room temperature and go to town grilling, smoking, baking, or pan frying to your favorite internal temperature. Once it’s done, you will have an incredibly tender and flavorful meal with very little extra effort. I call that a win!

Technique: Dry Brining

  •  Author: Mandy Pagano
  •  Prep Time: 1 hour
  •  Keywords: bbq, chicken, family-favorites, holidays, meat, beef, pork, poultry, steak

Ingredients

What you’ll need:

  • a baking sheet, with rims
  • a baking or roasting rack that will elevate your meat
  • paper towels
  • 8 oz (227 g) steaks, as many as desired (or will fit on your rack)
  • 3/4 tsp to 1/2 tbsp coarse salt (Kosher or unrefined sea salt are both fine) per steak
  • ground pepper, as desired
  • garlic powder, as desired
  • additional seasonings, as desired

Instructions

  1. Fit the rack into your baking pan.
  2. Pat each steak dry on both sides with the paper towels.
  3. Liberally season all sides of each steak, being sure to get the edges as well.
  4. Arrange the steaks on the rack so that air can circulate all around the meat. You don’t want it touching the bottom of the pan and you don’t want the sides touching.
  5. Place the whole thing, uncovered, in the fridge and let it stand there for 1 hour or up to 48 hours (I highly recommend overnight, but even one hour will make a very substantial difference).
  6. When you’re ready to cook, pull the tray out of the fridge and let it stand on the counter to allow the steaks to come to room temperature, around 30 min or so. Lightly pat the steaks dry if they look at all wet, but don’t be so aggressive you wipe off the seasonings.
  7. Cook your meats via your favorite method and to your favorite level of doneness and enjoy.
  8. Go dry brine all the rest of the things!

This content was printed from ketogenic-success.com

Direct URL: https://ketogenic-success.com/recipes/technique-dry-brining/

Articles, recipes, keto products, events, and other developments specific to the keto community. And it all starts with a free Keto Food Guide.


hello@ketogenic-success.com

740 4th St. N.
Ste 187
St. Petersburg, FL 33701
USA